But, in fact, interior designers and homeowners got far more creative than that with window treatments back then! We’ve gathered up some fun ideas to inspire your mid-century decor planning, or just to remind you of how homes used to look years ago.
With different fabrics and textures, some of these unique designs would effectively translate to more contemporary decor trends. Others, like the glass bottle window display, are timeless.
Semicircle window coverings with blinds inside (1972)
A smashing striped cotton fabric, laminated on a vinyl room darkening shade, established a lively note in a child’s room.
The wide window was framed with a semicircle of blue vinyl laminated on plywood that accents the blue stripe in the shade fabric. The same fabric was used to cover the throw pillows.

Mod pastel floral wallpaper strips on vintage blinds
Bonus retro decor: the transparent boxy blow-up seat.

DIY yellow window panels with a zebra print blind (1970s)
Here’s a striking example of an easy-to-do window treatment. Make double-fold panels for the inside of the window and cover with yellow patent leather vinyl.
Paint the window frame with black enamel. Staple zebra patent leather vinyl to the shade roller.

Matchstick blinds with yarn woven through (1970s)
A wall of glass offers a real challenge to anyone who must decorate on a limited budget.
Solve the problem with natural finish matchstick blinds that have been color-keyed to the room by weaving yarn through the horizontal slats.

Window blinds interspersed with fabric strips (1969)
Floral fabric strips were used to camouflage these everyday Venetian blinds. The muslin-lined strips were hung from a drapery rod hidden behind a matching valance, and anchored with another rod at the bottom.
DON’T MISS THIS: 25 retro curtains & drapes: Decor from the 60s & 70s

Surround your window with an all-new shape & outdoorsy feel
Color in large doses will revitalize any window. Make a lambrequin box from 1/2-inch plywood and cover by stapling fabric around the box.
Glue a striped fabric to a ready-made shade. To trim, glue fringe around the arch and across the bottom of the shade.

Add beads to shutter-style window panels for a retro mod look
Bright beads added sparkle to this treatment. Make wood shutter frames from 1×2-inch strips; then paint, hinge, and mount.
The easiest way to insert the beads is to buy them mounted on rods. Then, just fasten the rods to the tops and bottoms of the frames.

Make a DIY Roman shade with fabric (1970s idea)
To make a Roman shade, select a firmly woven fabric that you love, and cut it three inches wider than the window, allowing 11/2-inch side hems.
For horizontal pleats, add two inches for each pleat to the length. Use commercial Roman shade tape, and the job is easy.

Striped window shades in cream & beige (1964)

Vintage 60s faux stained glass style window treatment (1969)
To create a look like this, you can try using some stained glass window film (see several examples here) or a clear colored glass paint (like this one).
Colored glass bottles in a window display (1968)
Bare window is an ideal spot for a glass collection, providing a frame for the separate items. The light through the glass creates and ever-changing picture, and the sheer breeze curtain softens the effect.
A window display can block off an unattractive view, and save the space of a separate cabinet. It will also save having to dress the window with full curtains.

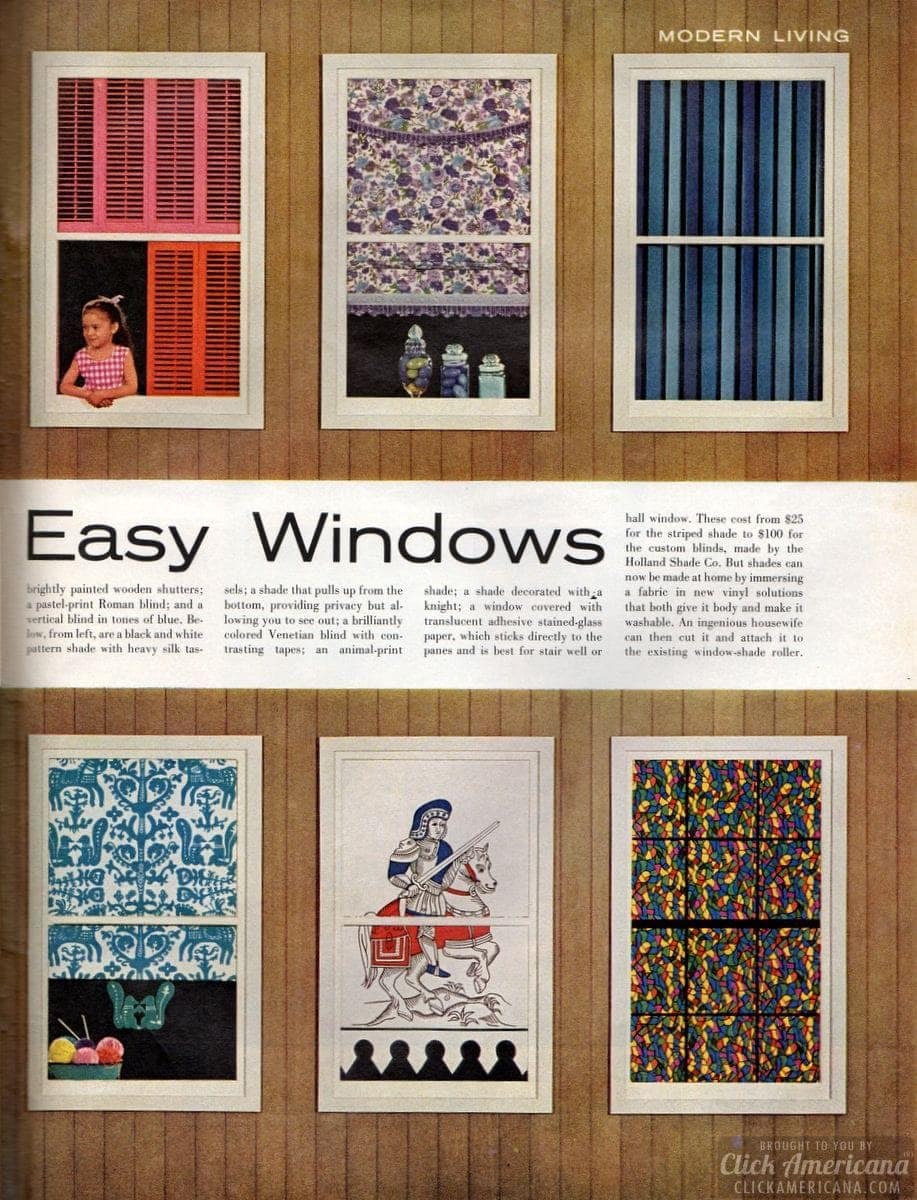
Bright, breezy easy windows: 12 new ways to decorate with window shades (1963)
Chintz curtains, like motherhood, have always been taken for granted as part of the American homemaker’s life. But, like motherhood, curtains can be a lot of bother.
Lately, a host of alternates have turned up — and here are a dozen new ways to decorate windows, all handsome and breezy and easy to care for. The patterned window shades control light and privacy as well as solid color ones, are good looking enough to be used without curtains.

Venetian blinds come in a wide range of colors, or the slats can be covered with any fabric. Roman blinds, which hang in deep pleats, and vertical Venetian blinds, can also be made of any material.
In the row above, from left, are: A floral printed Venetian blind which can match upholstery used in the room; a trompe l’oeil shade made to look like heavy shirring; a candy stripe shade suitable for a kitchen; brightly-painted wooden shutters; a pastel-print Roman blind, and a vertical blind in tones of blue.

Below, from left, are a black and white pattern shade with heavy silk taffeta; a shade that pulls up from the bottom, providing privacy but allowing you to view out; a brilliantly-colored Venetian blind with contrasting tapes; an animal print shade; a shade decorated with a knight; a window covered with translucent adhesive stained glass paper, which sticks directly to the panes and is best for stairwell or hall window.
These cost from $25 for the striped shade to $100 for the custom blinds, made by the Holland Shade Co. But shades can now be made at home by immersing a fabric in new vinyl solutions that both give it body and make it washable. An ingenious housewife can then cut it out and attach it to the existing window shade roller.
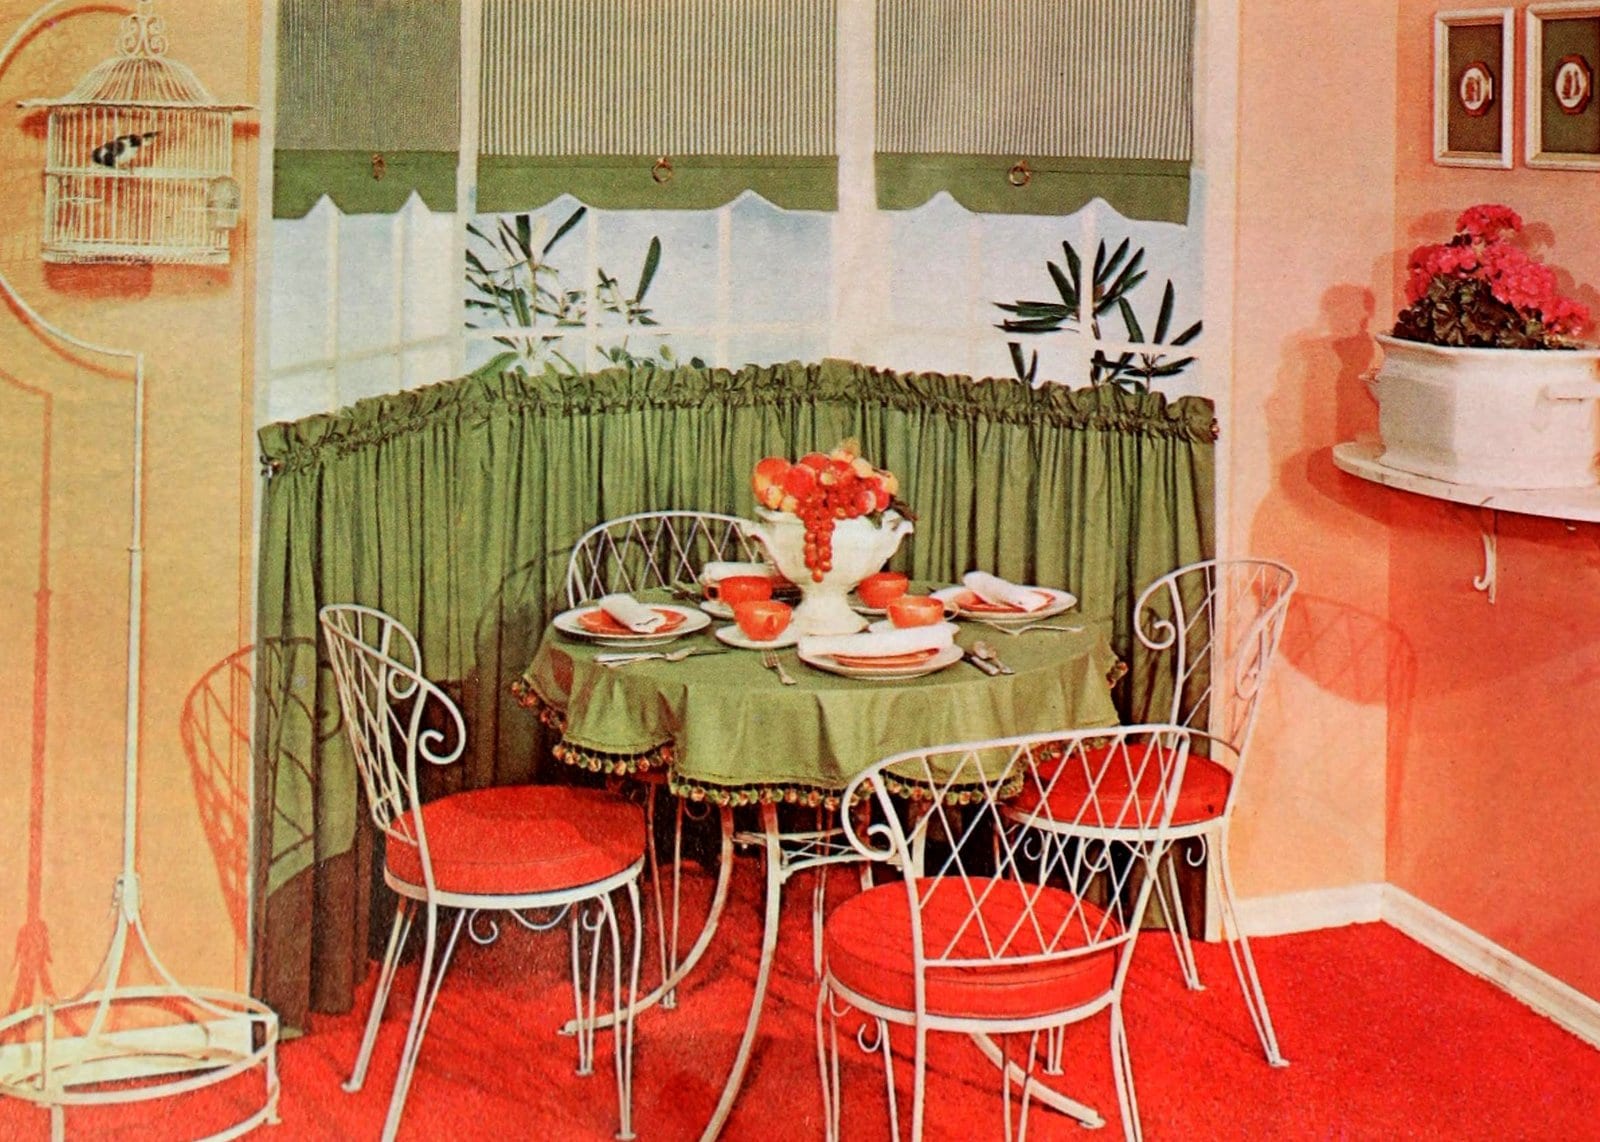
Retro kitchen cafe curtains with window blinds above

Wooden beaded window curtain (1969)

Re-shape your window & add fabric shutters
Reshape a window by cutting an arch from plywood and fitting it into the top of the window.
Paint the arch and the mullions black. Then, antique the shutter panels and window trim. As a finishing touch, use a bright print fabric in the shutters.

Panels: A retro trick to cover up ugly old windows (1965)
This window treatment completely covers old-fashioned or unsightly windows and makes an interesting textured wall, too.
Across the whole end of the room, you actually build a wall of light wood frames with fabric panels. The center panel is fixed, but the end panels open to provide access to the windows.
Use a light, open-weave fabric, if you want maximum air and light to come through. Make the center frame first from 1×2-inch wood strips.
DON’T MISS: See the mid-century modern Scholz Mark 60 home from 1960, inside & out
Staple or tack fabric over the back of this panel. Nail a strip of 2×2-inch pine at the floor and ceiling where you want the panel located. Stand the panel up against strips and nail it in place.
Now fasten 1×2-inch strips flat against the side walls from floor to ceiling to hinge the movable shutters on. Screw through these strips into a wall stud, or fasten them on with expanding flange fasteners.
Build the movable frames to fit the openings and hang them with butt hinges. Staple fabric on these panels, too.

Angled window blinds on an angled attic ceiling

Yellow sliding wooden lattice shutters
Ugly view? That’s no problem with this DIY window treatment from 1964.

Fabric-shade and wood-frame window treatment
The height of the frame depends on the installation. You can make the frame an inch shorter than the ceiling and insert threaded washers and carriage bolts along the top board to brace it.
If you want it flush with the ceiling — as shown here — run toggle bolts into the ceiling. Stain, seal. Dip heavy fabric in stiffening solution, cut to window size, and tack to shade rollers. Glue matching fabric to plywood panels mounted below each window section.

1960s window treatments – Blue dotted fabric mounted behind open window shutters

Pierced window surrounds with yellow window blinds (1970s)

Make colorful mod panels for sliding door or screen sections
This retro-style stained glass door is made from two frames with a translucent insert sandwiched between them.
Make two wooden frames from 3/4″ x 3/4″ strips of pine or redwood, with vertical and horizontal pieces put in a random pattern.
Fasten together with finishing nails and glue. Lay torn pieces of colored tissue paper onto white butcher paper. Coat with liquid plastic or clear varnish. When dry, sandwich panel between frames with staples.

10 more mid-century window treatments
AND NOW THIS: See 100+ short retro window curtains & cafe curtains that were essential 70s home decor


